Where might you put a beach ball pillow you ask? Well, depending on the color palate you choose it could easily find a home right on your living room couch!
One that I made ended up on my daughter's bed, and is just the thing to make her room feel a bit more summery.
So let's start with fabric selection shall we?
My tutorial today is for the traditional beach ball - made with the nautical colors of white, red, white, blue, white, yellow.
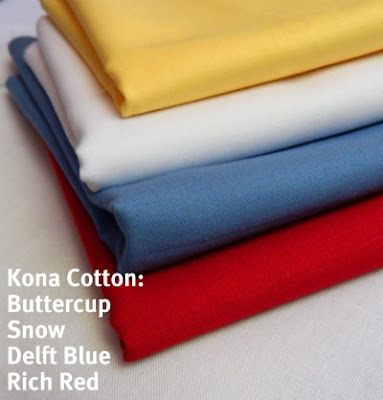
I choose some lovely Kona cotton solids.
I had never sewn with Kona cotton before, and let me tell you - it makes a difference. The practice pillows I made don't look nearly as nice as the Kona ones - I've been converted. I love them. So - if you want a little more pizazz than the traditional nautical color palate - you can choose either of these rainbow palates:
But really, beach balls can be made in any combination of colors - I even made one in different shades of pink!
So now that you've chosen your fabrics, you'll need 1/3 yard of each color.
Here are the other supplies you will need:
Scissors
Pins
Sewing Machine/Thread
1 bag of polyfil
Needle/Thread
In this tutorial, all seams are 1/4".
Step 1: Print out the free pattern. I suggest printing it onto a sturdy piece of cardstock. Line the straight edge up with the fold on your fabric. Pin the pattern to the fabric securely, and cut around the pattern.
Cut out 6 pieces. Three white, one red, one blue, and one yellow.
Step 2: Pin one white piece and one red piece right sides together.
Using 1/4" seam, sew along the pinned edge, removing the pins as you go.
Step 3: Press the seam towards the red piece.
This will prevent the red from showing through the white once you turn it.
Step 4: Pin another white piece to the other edge of the red.
Sew along the pinned edge.
Again, press the seam towards the red piece.
Step 5: Set what you've sewn aside and sew the remaining blue, white, and yellow pieces together. Remember to press the seams towards the blue and yellow pieces.
You should now have two halves for your beach ball.
Step 6: Pin the two halves right sides together - making certain you line up the top and bottom.
Leave about 5" of the bottom unpinned. This is the opening you will use to stuff the pillow.
Step 7: Sew around the pinned edges, remembering to leave the opening for stuffing. Clip fabric in each seam allowance right up to the seam (but not through it). This will help your pillow curve gracefully.
Turn your pillow right side out, now you are ready to stuff!
Step 8: Stuff your pillow so that it is nice and full. It will take quite a bit of stuffing since it is a sphere.
Step 9: Close the pillow using a simple blind stitch. Begin by bringing the needle up through the blue fabric.
Then down into the white, behind your first entry, and then back up through the very edge of the blue.
Continue doing this until you have closed the entire opening.
Step 10: Cut out 4 white circles with a 2 1/2" diameter. That is exactly the size of a 12 oz Mason Jar, so that's what I traced.
Stitch two circles together, all the way around.
Clip the seam allowance. Then cut a slit in ONE layer of the circle.
Turn the circle right side out and press. Repeat with the other circles.
Pin them onto the top and bottom of your pillow.
Using a blind stitch again sew the circles onto the pillow.


No comments:
Post a Comment