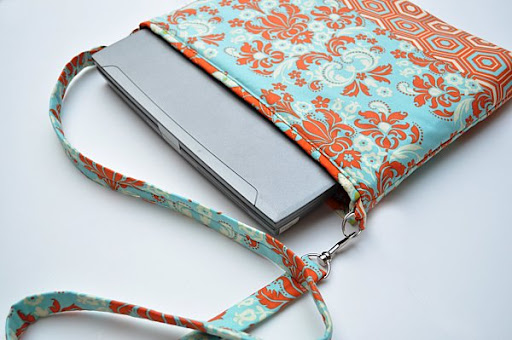
This is so purrrdy! I've been meaning to get a lap top case/bag for quite a while but haven't found anything that I really like. My problem is solved! Keep in mind that this doesn't have to be made for just to carry your lap top but can be revised and used for other types of bags. Here's a tutorial on how to make one which I found at: The Mother Huddle
The Stuff You'll Need:
- all your sewing stuff
- 3 coordinating fabric (not necessary)
- fusible fleece
- d-ring – or plain old ring
- clasps
Fabric Requirements:
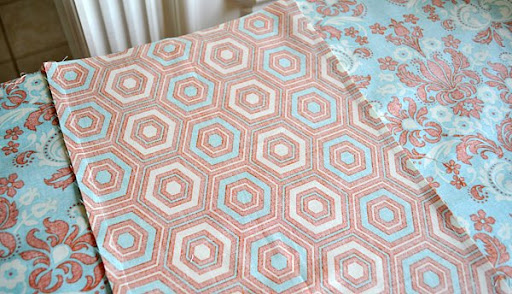
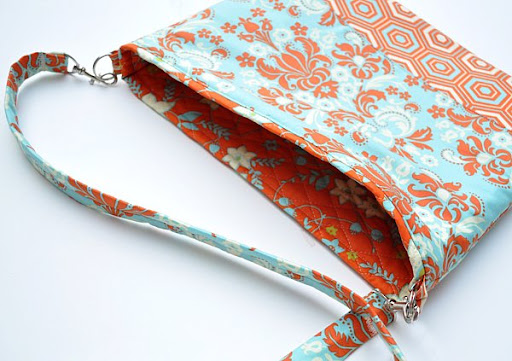
This will always very depending on how big you want the final product. You can look at the pictures to see where different fabrics were used:
- ½ yard for the inner lining (I used an already quilted with batting, it was on sale!)
- ½ yard for the outer sides, and strap
- ¼ yard for the outer bottom and scrap
- ½ yard fusible fleece (iron on, you will need more if you need to add some to your lining)
If you are not using this bag for a laptop, you could go with just a lightweight fusible lining. I adjust the lining to the project. This one needs to be soft. If your laptop is bigger, you made need to adjust these measurements
Fabric Cuts:
These cuts were based on my Dell lap top. For a Macbook Pro, add an inch where stated.
- One 16 x 26 inch piece for the inner lining (cut 17 x 26 for a MacBook Pro)
- One 9 x 16 inch piece for outer bottom (cut 9 x 17 for MacBook)
- Two 9½ x 16 inch pieces for outer sides (cut 9½ x 17 for MacBook)
- One 40 x 2¾ piece for the strap.
- Two 2½ x 5 inch pieces for rings
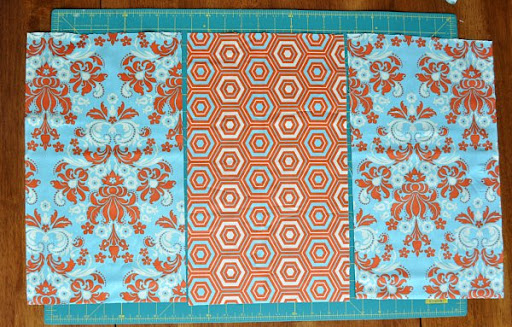
Start with the three outer pieces.
Sew the outer sides to the bottom with the right sides together using a 1/4 inch seam allowance. When you are done, you have a piece the same size as the lining.
Now cut a size of fusible fleece the same size as the pieced panel. If you don’t have an already quilted lining, you will want to go ahead and cut out fleece for it as well.
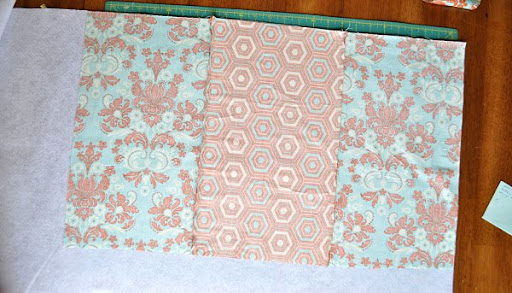
Press the seams on out on the panel.
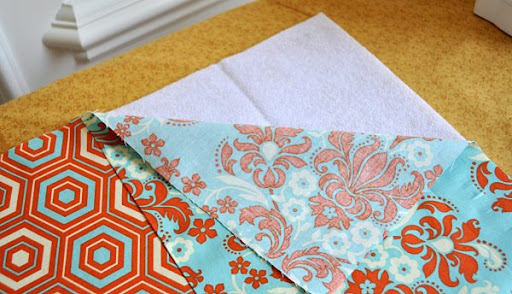
Now iron the fusible fleece to the wrong side of the panel, and also your lining if needed.

T
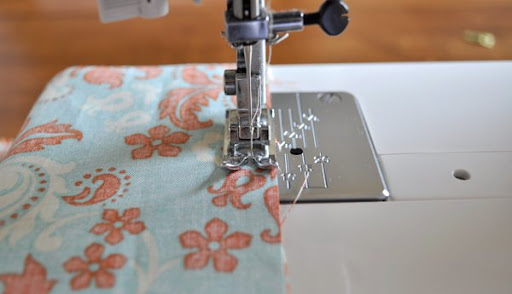
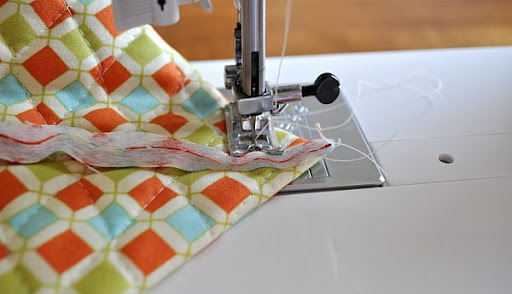
op stitch on the right side of the panel just along the side edge of the top panels, it will give you a nice finish. I like to use a little longer stitch length, then press with steam.
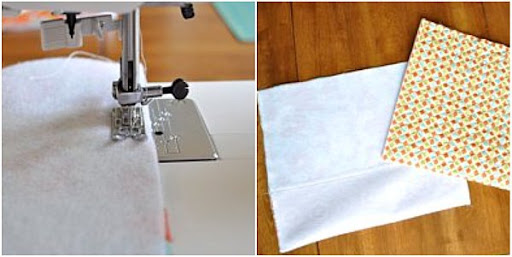
Now fold the piece in half, right sides and short ends together, and sew up each side. Repeat on the inner lining. My piece was double sided, but I did sew it with the right sides together. You should now have two pockets, that are the same size. Press the seams out.
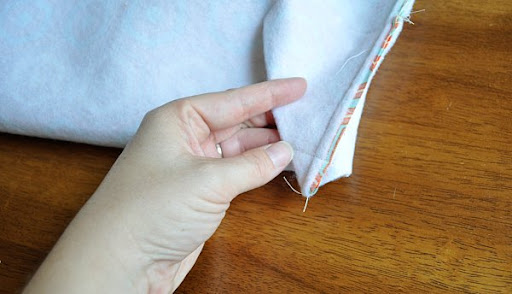
Now we are going to sew the corners. Keep in mind when you are customizing this project, how big you make your corner, is how wide the finished product will be. In this instance, I only sewed a one inch stitch across the corner, because I didn’t need it to be too wide for a laptop.
Repeat on all corners for the lining and outer piece, making sure they are the same.
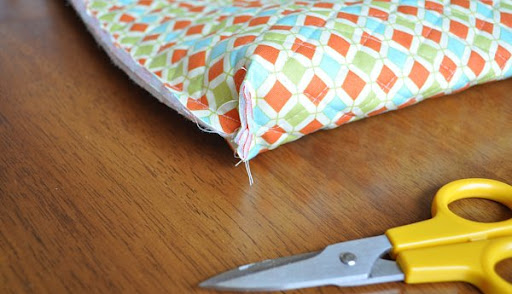
Cut off the corners on the lining.
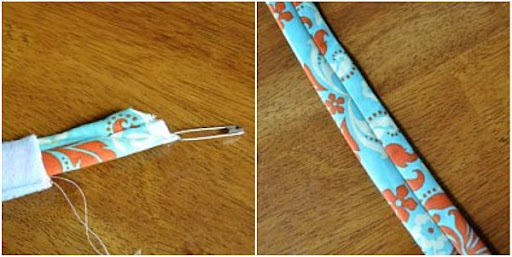
Next, the strap. Cut a piece of fleece the same size, iron on. Then fold in half with the right sides together to make one long tube. To turn out, attach a large safety pin to one end and pull through the inside. Then press in half with the seam down the center. You can top stitch both sides if you like.
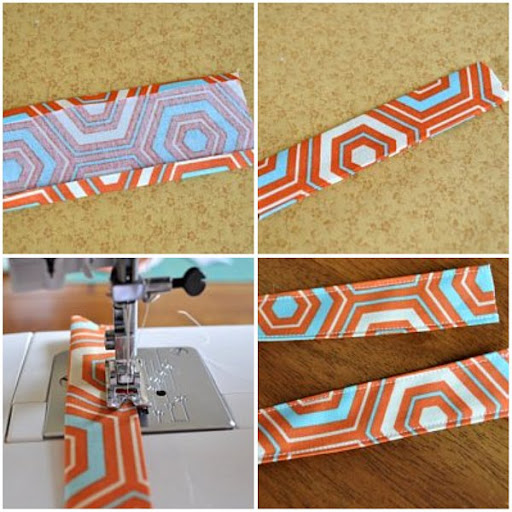
Now the little pieces for the rings. Iron the sides over 1/4 inch, then in half, sew up the sides, then top stitch the other side. You will have two little straps.
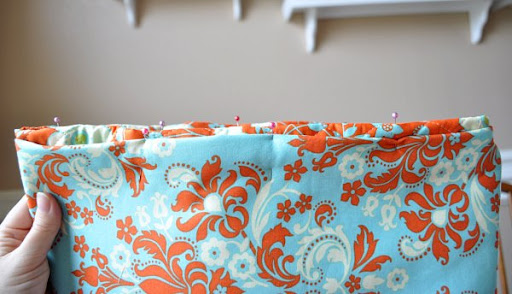
Now let’s assemble the bag. Turn the outer panel right side out. Leaving the lining right side in, tuck inside the outer pouch. Now fold the top of the outer panel in a full inch, and the top of the lining out about an inch and half. Just make it so that the two overlap a half inch to sew together, and pin all the way around. I like to start at the sides, then work toward the center. I also offset the seams at the ends just a bit to reduce bulk.

Take the little pieces with the rings on, folded in half, and tuck them in-between the two layers on the ends like shown. At this point you could pin in whatever you want to customize the bag. A little strap for a button latch, a flap to pull over…just have fun with it!
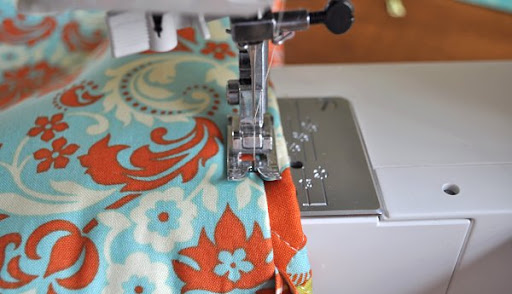
Now just sew it all together! Just easy does it, start in the center, and sew right along the top outer edge making sure to include all layers. I also like to use a little longer stitch length here, and don’t forget to back stitch!
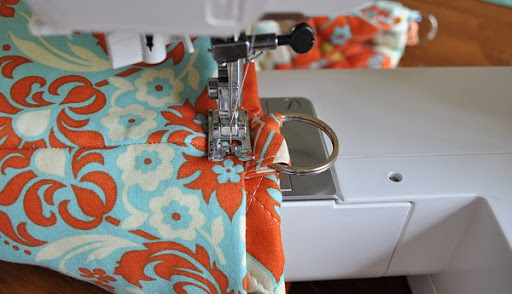
When you get to the strap, make sure to back stitch a few times.
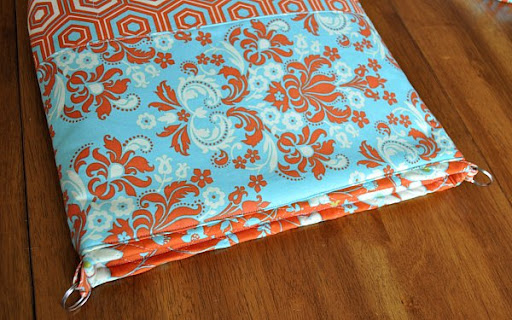
And there you have it! Easy! I like to press the top to make it nice and crisp.
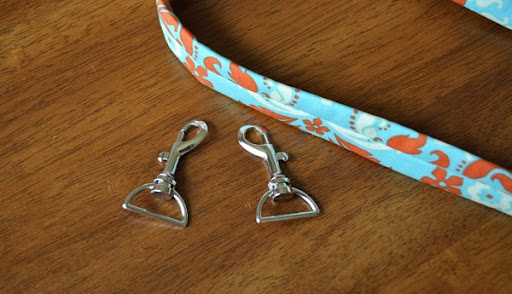
Now to finish off the strap. Take your clasps…
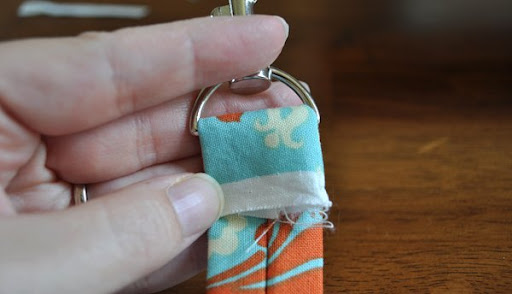
Insert one end…
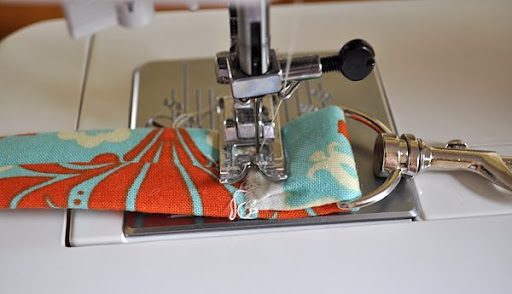
And sew a zigzag stitch right along the raw edge, back stitching a few times to really secure.
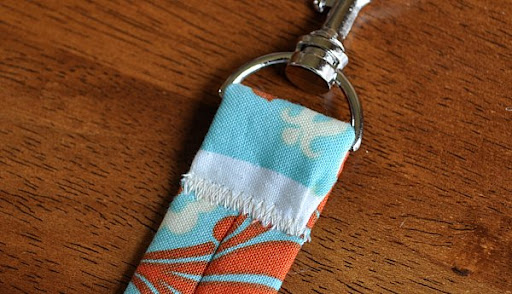
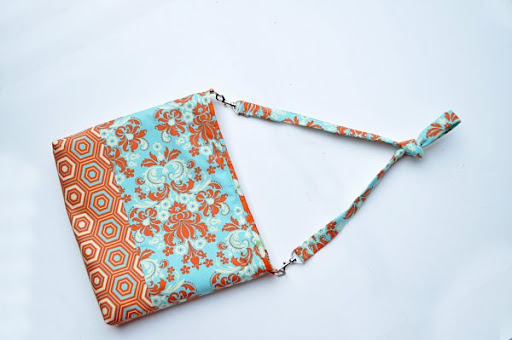
All done! Just hook ‘em up!
Now you have a bag!
You could even use this as a satchel for notebooks, back-to-school isn’t that far off . Add a flap, and a little deeper pockets at the bottom and it would hold books…getting the idea?
Now to customize it. First, if you visit the other links I provided, they will also have some measurements, and give you an idea of how you can switch things up. Here is the basic technique:
- You need two pieces the same size. In your measurements account for the front, the sides, and the base of the bag. You need to add a 1/2 inch to the sides for seam allowance and one inch to the top for folding down. If you want a pieced outer panel, sometimes it is just easier to make that panel first, then cut the inside panel to match the finished first panel.
- For interfacing, you need to determine how you are using the bag to decide on what to use. For my hanging fabric baskets I used a heavy craft bond, because I needed them stiff. For the laptop bag I used a batting, I needed it padded. For the purses I just used a medium weight.
- Then just decide how you need the top to function. You may need just one large flap that stretches the length of the bag, or just a magnet clasp on the inside. Do you want two straps, or just one? Need a little tab to pull over the button? Just include any of these items in the top fold before you sew.
- Oh and pockets! You can just sew them onto the inside panel before you form it into a bag.
ENJOY!
No comments:
Post a Comment